Your Source For Stock Show News
Red Paint 101 | Tips from Stock Show University®
Everyone knows Sullivan’s Jet Black and Sullivan’s Black Finisher when it comes to fitting black cattle, but have you ever used the red paint line that Sullivan Supply has to offer when fitting red cattle? During this tip from Stock Show University®, we are diving into the science and purpose of each of the red paints that Sullivan Supply® has to offer for your show day needs at the chute.
When Sullivan Supply® came out with this red paint line, the show industry had never seen this number of color selections before. With this line, you can now rest easy knowing that the right shade is within reach when dealing with red cattle. For the red paints, we have 5 red-based colors to match your needs: #1 Fawn, #2 Copper, #3 Brick, #4 Red Velvet, and #5 Dark Crimson. All 5 of these paints are made with the same quality of excellent coverage, texture, and color dimension to enhance your animal’s natural hair color – like features that you expect from Black Finisher and Jet Black.
Most questions when it comes to this product line are along the lines of: What red paint will match this animal the best? Each of the red paints has its own name but is also classified as a number, 1-5. The larger the number is, the darker the paint is. Below are the 5 different paints along with a description of what red color each of them match:
#1 Fawn – Fawn Touch-Up is the final touch-up for covering adhesives and leg builders on light red hair with an orange tint, found on lighter colored Hereford, Gelbvieh, Limousin and Red Angus cattle.
#2 Copper – Copper Touch-Up is the final touch-up for covering adhesives and leg builders on medium red hair with a faint brown tint found on Hereford, Red Angus & Light Shorthorn colored cattle.
#3 Brick – Brick Touch-Up is the final touch-up for covering adhesives and leg builders on medium red hair with a brown tint found on dark Hereford, medium Shorthorn & Red Angus colored cattle.
#4 Red Velvet – Red Velvet Touch-Up is the final touch-up for covering adhesives and leg builders on medium-dark red colored hair, especially dark red Shorthorn and Red Angus cattle.
#5 Dark Crimson – Dark Crimson Touch-Up is the final touch-up for covering adhesives and leg builders on darkest red colored hair found in Shorthorn cattle.
When trying to color match your animal, Stock Show University® Professor P.D. Miller suggests that you color match prior to the show. “This is something that you need to test before you start fitting at the show. My advice is to grab a couple of cans that you might think match your calf, and then test them on the calf at home. If one color doesn’t directly match, mixing two of the red paints also works well, spraying them on the calf at the same time to mix the two colors properly.”
Along with these 5 red paints, Sullivan Supply® has 2 additional paints that were added to this line of touch-ups. Blondie, used on light yellow, cream, & butterscotch colored hair, especially on Composite Charolais cattle, and Silver Fox, used on gray and silver hair, also as found on Charolais influenced cattle.
For more tips and video tutorials from Stock Show University®, visit https://www.sullivansupply.com/stock-show-u/online/

JUNIOR NATIONAL SURVIVAL GUIDE | TIPS FROM STOCK SHOW UNIVERSITY®
It’s officially summer in the show barn, and that only means one thing – It’s Junior National time! Junior National shows across the United States is definitely an eventful highlight for many livestock exhibitors during the summer months along with our staff here at Sullivan Supply®!
These events give the opportunity to young people and their families to travel across the United States to exhibit and showcase the cattle they have worked on all spring and early summer. Even though you are attending for the show, young people also have the opportunity to participant in personal growth contests, such Public Speaking or Showmanship, and continue to learn through educational clinics at the show, like clinics hosted by Stock Show University®. But most importantly, this week can be used to build life-long connections and relationships with other participants within the breed.
Even though Junior Nationals is considered a vacation for most livestock families, this vacation might be more stressful than a vacation to the beach. Anytime you and your family travel as a group and with livestock on the trailer, it can be a stressful situation for everyone involved. During this Stock Show University® tip, we plan on sharing some helpful advice with you and your family, so you all can survive this Junior National season!
- Junior National week might be overwhelming, regardless if this is your first junior national or your last. Knowing this beforehand can help with you being nervous and know you are not the only one feeling this way. If you have any questions throughout the week over anything regarding the show, be sure to politely ask show staff or a junior board member. They have dedicated months preparing and planning for this week to be a pleasant experience for you and your family, so they are always willing to help out an exhibitor.
- Look at the week’s schedule and mark out all the activities that you are participating in or activities that you are wanting to attend. Like everything in life, things come up, and you have to adapt around them, but this will give you a rough schedule that you and your family can prepare for during the week. Be sure to relax throughout the week as well, so you are not burned out once show day arrives. To check for updates or schedule changes during the week, check out the social media outlets for your breed and The Pulse, Powered by Sullivan Supply!
- Check out the Sullivan Supply® Trailer and all the Sullivan Supply® sponsored events that we have in store for you all! A Sullivan Supply® representative at the trailer will always be willing with assist you with any question you may have about product knowledge or techniques how to properly use of products. Also, be sure to attend the “Livestock Loot Giveaway” to have a chance to win some spending cash to use at the Sullivan Supply’s Stock Market Fan Shop. Last but not least, be sure to attend the Stock Show University’s educational clinics to learn from some of the best in the industry on the latest fitting techniques and tends.
- Double check that you have packed the essentials for the cattle and the people. For the humans – don’t forget phone chargers, plenty of cool clothes, professional show clothes, snacks and drinks, and a positive, cheerful attitude. For the cattle, be sure to pack all the summer weather essentials – such as Restore Pro, Turbo Fans, Smart Buckets, and Sullivan’s Appetite Express. If you happen to need any of these items once you are at the show, head over to the Sullivan Supply Trailer to have one of our sale representatives assist you. Also, remember to pack all the important paperwork that you might need during the week such as registration breed papers, health papers, and copies of your entries. Tip: Create a self-packing list days before you leave and check off the items once they are packed in the truck or on the trailer.
- Review the rule book. This is never a bad idea to do, regardless of the show you are going to. Just like one of the previous bullet points – if you have any questions about a rule in the rule book or just need clarification of the rule, reach out to show staff or a junior board member to receive clarification for a resourceful source!
Be sure to have a FANTASTIC and SAFE experience at the Junior National Show you are attending this summer!
For more tips and video tutorials from Stock Show University®, visit https://www.sullivansupply.com/stock-show-u/online/

When Should I Start Fitting My Calf? | Tips from Stock Show University®
When should I start fitting my calf? This is a common question that most first time beef exhibitors ask and participants at Stock Show University® events.
The rule of thumb is that you should allow approximately two minutes per head. You will need to count the number of head that show before you to determine what time you will approximately show. For example, if your animal is the 65th head in the show order, you will need to take 65 and multiply it by 2 minutes. This will get you the total amount of minutes that it will take from the beginning of the show until you will be in the showring. (65 x 2 = 130 minutes)
Now, say the show starts at 8:00am. It is safe to say that you will be showing around the time of 10:15 am. Knowing that information, you should give yourself at least one hour before you show to fit your dry, clean animal. So for the example that was previously used, you will need to put your clean, dry animal in the chute around 9:00am.
For more tips and video tutorials from Stock Show University®, visit https://www.sullivansupply.com/stock-show-u/online/
Welcoming Your New Calf Home | Tips from Stock Show University®
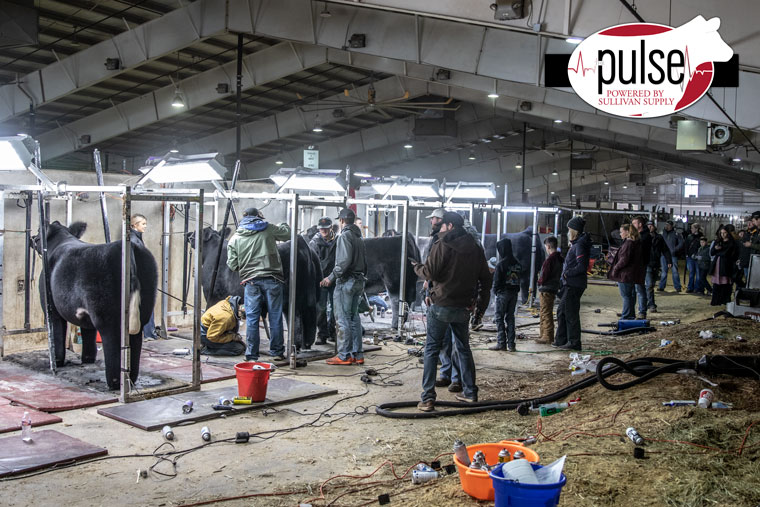
(September 2022) – If you scroll on any type of social media, you can gather that it is the time of year when many people in the show cattle industry are having their annual calf sale. Having said that, this is also the time of year when many individuals are going to start getting their new projects for the next show season. Stock Show University® would like to remind you on some pointers and tips when bringing your new project home.
When thinking where your animal is going to stay, make sure you consider the size of the pen you will be having your calf in. The pen should be big enough to allow the animal to move around freely, but not too big until they get used to their new surrounding. You want your animal to be comfortable and calm as your home is new to them. Once they do get used to their surroundings, you can move them into a larger pen. If you are wanting to keep your animal inside all day while it is still warm outside or just get them out of the weather that particular day, be sure to kick out your animal in the evenings. Airflow is always important when you are wanting to keep your animal in the barn. Your animal will remain stress-free and more calm when they are getting fresh air rather than being in a barn that is completely shut up with minimal air flow.
Correct bedding for cattle is always essential—even when you first get them home. You want to avoid large areas of concrete for your calf’s pen. You want their pen well padded and clean. If you’re going to be bedding down an area of concrete for your animal, make sure there is 2”+ of bedding on that concrete. The best way to visual this is to think about that your legs and feet feel like after standing and walking on concrete all day. Your calf will also feel the same if their pen is concrete. Again, you want to have your animal to be comfortable.
Maybe the most critical thing to consider when getting your animal home is their feed and water source. If you are changing up your calf’s diet once you get them home, make sure you gradually change the feed, so your calf can adjust to the change. TIP: Ask the seller for some feed, so you can continue to feed that calf the same ration they have been on, and then gradually switch them to the feed you will be feeding your calf. Also, providing access to clean, fresh water at all times is essential for your calf once they get home.
For more tips and video tutorials from Stock Show University®, visit https://www.sullivansupply.com/stock-show-u/online/

Breaking Your Calf 101 | Tips from Stock Show University®
If you are like most—once you have your new calf home, you are excited to start working on them. One of the first things that you will have to do is get your calf halter broke, if it already isn’t done for you by the breeder/seller. Sullivan Supply® would like to remind you of some pointers and tips when you start to halter break your calf.
Keep in mind that you need to take things slow because every calf is unique and react to the halter differently. When you rush this process, it might make you frustrated along with getting your calf worked up as well. During this process, it is essential that you gain the calf’s trust, along with them trusting their surroundings. This will have a long term effect on how they act at your facility and how comfortable they are around you. Last but not least, halter breaking and learning to lead can be stressful on the animal. The last thing that you would want is to rush this process and end up hurting your animal.
When you are first trying to halter break your calf, you will need to use a rope halter. Our Stock Show U Professors suggest that rope halters that have the rings in them to allow a little less stress to the animal. This allows them to be the most comfortable—even though they might be still pulling back and fighting the halter. (Beginners—When putting on the halter, be sure that the lead strap is always on the calf’s left side and that the halter fits correctly on their head; not too loose or too tight where it is in their eyes.) Once you have the halter on them, it is not a bad idea to just let them get use to having the halter on their head and then eventually tie them up. You want this process to happen in a small pen, so they can not run away from you, and they can be close to you in a small area. After they feel comfortable with you in the pen with them, it is time to tie them up. When you start to tie them up, you need to start with tying their head low and then gradually tying their head higher and higher the more comfortable them get. The first couple of times, this process should be in an area that is more confined as well to reduce the animal from swinging all over the area.
Once they are tied, you can start using a plastic comb or a show stick to help them get used to them getting touched and all the equipment that you will be using on them down the road. Also, this should be done in 2-3 hour increments and gradually work up from there each time you work with them, along with making sure they are watched over during this time. After a couple of times being tied up, you can start trying to lead them. Again, take this process slow as well for the best results.
For more tips and video tutorials from Stock Show University®, visit https://www.sullivansupply.com/stock-show-u/online/

SLICK SHEARING BASICS AND TIPS | TIPS FROM STOCK SHOW UNIVERSITY®
In a wink of an eye, it will be time for the Texas Majors. In this Stock Show University tip, review the basics of slick shearing and some tips from trusted Stock Show University® professors. Just like haired cattle, it is important to have a game plan when preparing for your target show when it pertains to your calf’s hide. Below are 4 listed points to remember when creating your daily care routine for your stick steer:
- Wash at least once a week during the 100-120 days prior to your target show. Even though you will be slicking off the hair, you need to maintain a healthy, hydrated hide on your calf.
- Plan to shear your animal about one to two weeks before the show. When shearing over your animal, make sure you are applying the same amount of pressure throughout the whole animal, using vertical strokes with a T-84 blade. Tip: “Be careful to get all the hairs on the animal. This is a long process, but it is a must to get each and every hair.”
- To maintain that healthy, hydrated skin and hide, wash each day of the final week leading up to your target show, with conditioning after. After all the hair is gone, you can start really focusing on the areas that need attention (dandruff areas), as these spots will be visually easier to see.
- Shear over your animal again three days before show day.
Throughout all of these steps, here is a list of Sullivan Supply products that are recommended to maintain the healthy, hydrated skin: Revive, Revive Lite, Rejuvenate, Healthy Hide Lotion, Healthy Hide Lotion Lite, Freshen Up.
For more tips and video tutorials from Stock Show University®, visit https://www.sullivansupply.com/stock-show-u/online/
Recognizing Classification/Breed Divisions in the Steer Ring | Tips from Stock Show University®
Each steer show that you might attend across the United States could be a little different when you look at how divisions/classes are divided. Some shows require valid breed association papers that identify the animal as a certain breed, while some shows classify animals based on certain phenotypic (visual) traits.
When showing at a classified show, steers should be shown based only on their phenotypic traits, as that is how they will be evaluated for classification. Show classifiers, a group of individuals making sure the steer are placed in the correct division, are asked to exercise their judgment to the best of their ability for the show. In this Stock Show University® tip, we will be presenting an example to you about classifying market steers as breeds in the ring.
Just as a refresher, there are the three types of breeds we classify our animals: British Type, Brahman Type, and Continental Type.
- British Type – This group includes cattle that appear to be purebred Angus, Hereford, Polled Hereford, Red Angus, and Shorthorn.
- Brahman Type – This group is sometimes called American Breeds. Physical evidence of Brahman background is important (ear length and shape, amount of hide, hump/crest).
- Continental Type – Sometimes known as Exotic breeds, this group includes Charolais (half-blood and higher), Limousin, Maine-Anjou (half or higher), and Simmental (purebred).
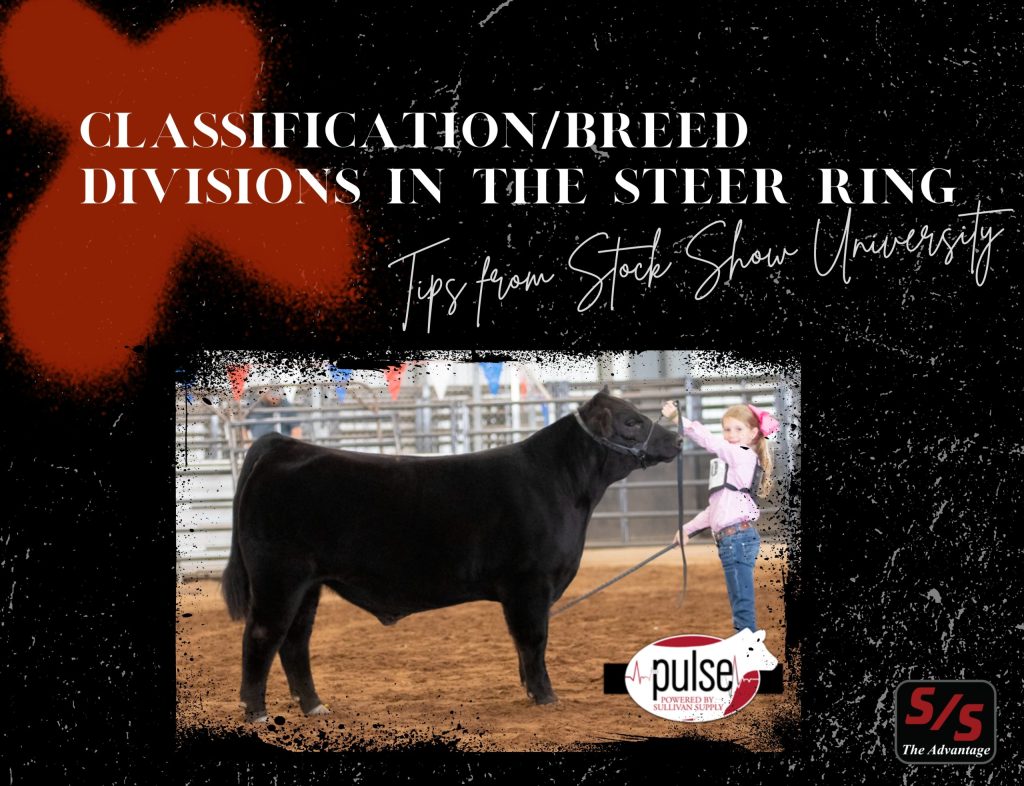
The example that we are going to give you in this Stock Show University tip is that you have the steer that is in the graphic attached to this story. When entering this steer for the show, you would like to show him in the Angus division.
To make sure that he gets classified for the Angus division, this steer needs to meet the following qualifications:
- Must physically exhibit breed characteristics of a purebred Angus
- Solid Black
- Polled (naturally hornless)
- Needs to have a tight sheath that is round and perpendicular to the ground
- Angus-type ear set, small to moderate ear size high on the head
Keep in mind that discriminatory breed characteristics include:
- Continental breed type structure (being coarse about his joints, not to be confused with big-boned cattle) and head
- Bumps where horns would be on a horned animal
- Birthmarks or white hair in the switch should be reviewed for the skin color (black skin color is acceptable; white or pink skin is a disqualification)
- Non-Angus-type ear set (ear set and excessive ear size as in Continental breeds)
- Large navels and angular sheaths
When looking at the picture, you could say that this steer WOULD pass as an Angus. Below are the absolute disqualifications when looking at Angus steers for the show:
- White skin resulting in white hair above the underline or in the front of the navel (White on the navel is acceptable)
- White skin resulting in white hair on the leg, foot, or tail
- Horns or scurs (undeveloped horn growth)
- Brindle (a streaking of black, brown, or white on the body of the steer, aka tiger stripe)
- Diluter color pattern
- Dehorning scars
- Double muscling
Like stated before, it is always essential to look at the breed qualifications before the show to see where your steer should be placed based only on their phenotypic traits.
For more tips and video tutorials from Stock Show University, visit https://www.sullivansupply.com/stock-show-u/online/.
Sources – https://bigtex.com/wp-content/uploads/2022/09/2022-SFT-Classification-Guidlines.pdf
For more tips and video tutorials from Stock Show University®, visit https://www.sullivansupply.com/stock-show-u/online/
Tattooing Cattle for Registration | Tips from Stock Show University®
If you have a pasture full of 100 Purebred Shorthorn cows, what is the most effective way to keep track of which cow is which? Most will provide the answer of, “An Ear Tag.” BUT, what if the ear tag falls out? Proper, permanent identification is essential when cattle are being registered through a breed association or when there is a transfer of ownership. Effective identification can also allow producers to keep proper records on herd performance to monitor genetic improvements. During this Stock Show University® tip, we will be discussing the different types of identification for cattle and the “Ins and Outs” of tattooing.
There are two types of identification when IDing cattle: permanent and non-permanent. Ear tattooing is considered one of the easiest, most effective forms of permanent animal identification that a breeder can do. The one disadvantage of tattooing is that individuals can not see the tattoo from a distance, so individuals have to physically look into the ear to see their identification. Even though a tattoo is recommended and required for registration, most producers still use a secondary method of identification on that animal as well, like an ear tag.
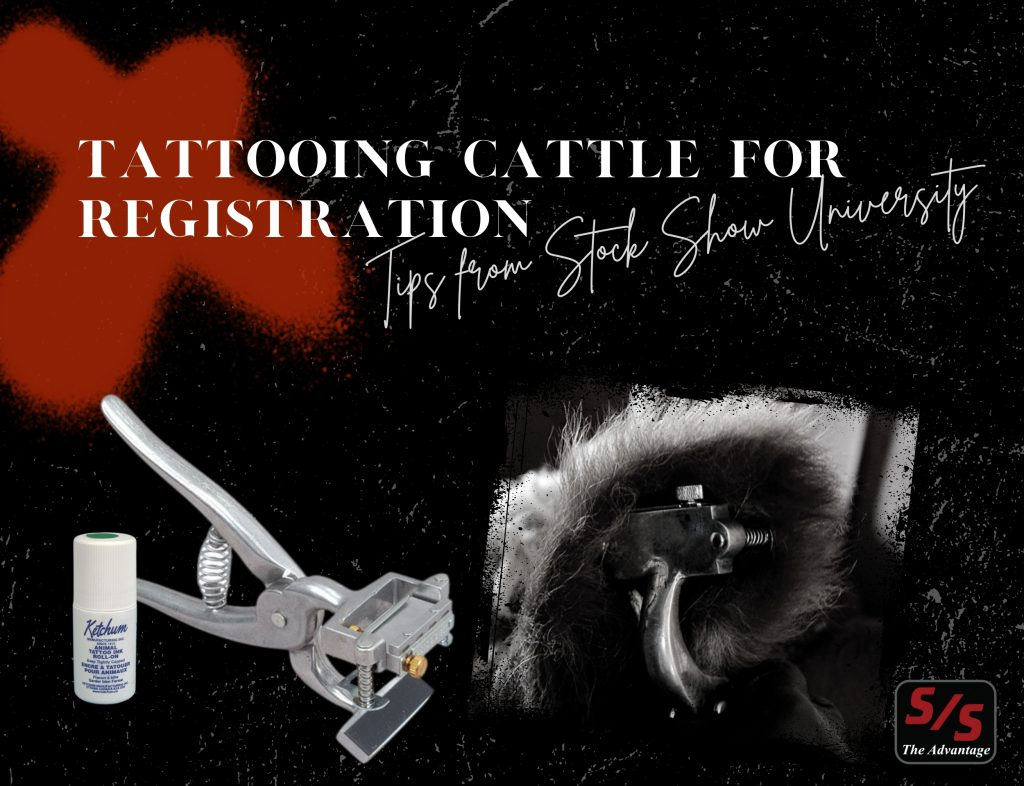
The process of tattooing allows for a series of numbers or letters to be permanently placed, most commonly in the animal’s ear, using sharp, needle-like projections that pierce through the skin using a specially designed set of pliers, called a tattoo gun. Tattoo ink is then forced into the puncture marks and remains visible after the puncture wounds heal.
If you visit the American Shorthorn Association’s website, you can get a proper, step-by-step description of all the steps that you need to do when properly tattooing a calf for registration. (https://shorthorn.org/tattoo-101/)
FOR YOUR RECORDS: Like mentioned before, tattooing allows for a series of numbers or letters to be permanently placed. The letter for the 2023-2029 are as followed: 2023 – L, 2024 – M, 2025 – N, 2026 – P, 2027 – R, 2028 – S, 2029 – T.
For more tips and video tutorials from Stock Show University®, visit https://www.sullivansupply.com/stock-show-u/online/
Communication is Key | | TIPS FROM STOCK SHOW UNIVERSITY®
Are you scared of speaking in front of large groups of people? The fear of public speaking is very common, as it is believed to affect up to 75% of the world’s population. Both in the Agricultural Industry and all other industries, employers are looking for individuals that can communicate effectively—through oral and written forms. During this Stock Show University tip, we will be covering the basics of creating a Prepared Public Speech to help you for your next 4-H/FFA contest or if you are competing in this contest at a specific Junior National Show this coming summer.
There are 5 BIG steps when creating the Prepared Public Speech.
Number 1—Know Your Audience. This is a very critical step as you will need to choose a topic that is engaging to the audience you are presenting to along with being age/experience appropriate. For example, if you knew your audience was a 4-H club that was made up of a lot of first year goat exhibitors, you might want to decide a topic that is entry level, such as daily care practices, compared to delivering a speech about perfecting a back leg when clipping and fitting, which is an advanced topic.
Number 2—Select Your Core Message. “What do you want people to take away from your speech?” There are times when people start a speech that is well-thought-out and researched, but often lose the audience’s attention because there are too many messages. When correctly writing a speech, decide a core message, so listeners can focus on the one topic throughout the speech. Let’s say you are giving your speech about daily care practices for show goats. Your core message might be that you want to make sure that the audience understands the science behind healthy, hydrated skin for goats, as you believe that is what your audience is seeking. Once you have what you want your core message to be, you can start the research process.
Number 3—Research and Evaluate the Information. Stock Show U’s advice for this step: Research until you drop. There is no such thing as collecting too much information. When collecting this information, use resources that are factual versus websites that can be edited by the public. It also is a very good idea to find several sources that are valid instead of just one source. Also, when collecting research, don’t just think that you have to collect your information from the internet. Interviews with trusted professionals are also a great resource when writing speeches.
Number 4—Develop Structure to Deliver Your Message. The question you might ask yourself when getting to this stage is, “Where do I even begin?” When piecing our speech together, you need to structure your speech into three different parts: Introduction, Body, and Conclusion. Within the introduction of your speech, find a way to get your audience’s attention, such as starting your speech with a story or questions to engage the audience and get them “hooked”. If we are still on the topic of show goats, this might be a descriptive story about the first time you showed a goat at your county fair. The body of your speech needs to be the “meat and potatoes” of the speech—including all the factual information that you have collected in step number 3. In our goat story that we have been discussing, this might be the factual information about Sullivan’s Vita Hair Nourishing Vitamin Package, why these products are so important to use on your goat’s hair and skin, and morning/night routines in the show barn. Lastly, within the conclusion of your speech, you will need to make sure to bring your audience back in and make it clear to your audience what the core message of your speech was.
And last but not least, Number 5—Spice it Up. When delivering a speech, the last thing you want to do is make sure your speech sounds like yourself. Instead of making your speech sound like a paper you would write in English class at school, change up the sentence structure of your speech and make it personable to your audience. Another great piece of advice is to add quotes to your speech to make your speech more relatable to your audience and create a divide within your speech from all the factual information.
For more tips and video tutorials from Stock Show University®, visit https://www.sullivansupply.com/stock-show-u/online/

FIGHTING OFF THE RINGWORM | TIPS FROM STOCK SHOW UNIVERSITY®
If you have been in the industry, you know that this is the time of year when many cattle people start to fight ringworm within their show string. In this tip from Stock Show University®, we will be covering the basics about Ringworm and some preventive measures for you to have in your show barn this winter show season!
So, what is Ringworm actually? Ringworm is a fungal infection of the skin. Ringworm is frequently more aggressive in confined cattle during the winter months and less frequent in the summer months. Even though that ringworm is a contagious disease, your chances are reduced when your calf maintains a healthy hair coat during the winter months. This is because when a calf’s hair is lacking their natural hair oils, your calf is more susceptible to Ringworm. To maintain a healthy hair coat during the winter months, use Sullivan’s Revive daily – which is one of Sullivan Supply’s best-selling daily care products that is high in Vitamin E and fortified with VITA HAIR™.
Even if you are keeping up on their daily hair care maintenance of your calf, it is still important that you are regularly checking for Ringworm – so you can catch the problem before you have a severe outbreak. When examining your animal for Ringworm, you should look for hair loss in a circular pattern and development of heavy, gray-white crusts and redness at the site of infection.
As mentioned before, Ringworm is a contagious disease, so the spread of Ringworm occurs in two different ways: through body contact of an infected animal or through objects used on infected animals. Having said that, it can be spread from animal to animal by your favorite show products such as: SMART Combs, SMART Scrub Brush, clipper blades, SMART Feed Pans, rope halters, blower hose nozzles, etc.
A preventative measure or a cure for Ringworm that Sullivan Supply® can provide to your show barn is Sullivan’s Fighting Five. Fighting Five is a blend of natural oils that prevents, eliminates, and heals all types of fungus such as Ringworm. The unique ability to repair the damaged skin on your animal results in faster hair growth. Fighting Five can be used to prevent a breakout if the animal has been exposed to areas infected with fungus. It is recommended to treat equipment that has been exposed to Ringworm and other fungus with Fighting Five or Sullivan’s Anti-Fungus Equipment Dip.
Last but not least, be aware for yourself! Ringworm is a zoonotic disease, which means transmission to humans can easily happen!
For more tips and video tutorials from Stock Show University®, visit https://www.sullivansupply.com/stock-show-u/online/
